

Stripe is a versatile payment processing you can use to accept payments on your online store, or to invoice your clients.
In this article, I’ll show you how to enable Stripe in your Shopify or WooCommerce store, as well as how to create invoices for one off or recurring invoices.
You can jump to each section below:
Create a one off invoice (inside Stripe)
Create a subscription (inside Stripe)
Two Quick Reminders
Before we move into the tutorial, here are two quick reminders you need to take note of.
Stripe’s Fees are quite high
Stripe’s fees are 3% + RM1 for both credit/debit card as well as FPX payments. This is a lot more than what local payment processors charge, about 2.2 – 2.7% without a flat fee.
The only other payment platform that charges more is PayPal (>4%).
If you use Stripe’s Subscription feature, you’ll be charged an additional 0.5% – 0.8% for the feature on top of the transaction fees.
You need a Stripe account first
Before you can go through with the next steps, you need to have a Stripe account first.
Go to Stripe.com to sign up for an account first.
How to Enable Stripe in Shopify
One of the biggest advantages of accept payments on Shopify using Stripe is that you won’t get charged a transaction fee.
The first thing you need to do is go to:
Settings > Payments
Under Payment Providers, choose Stripe.
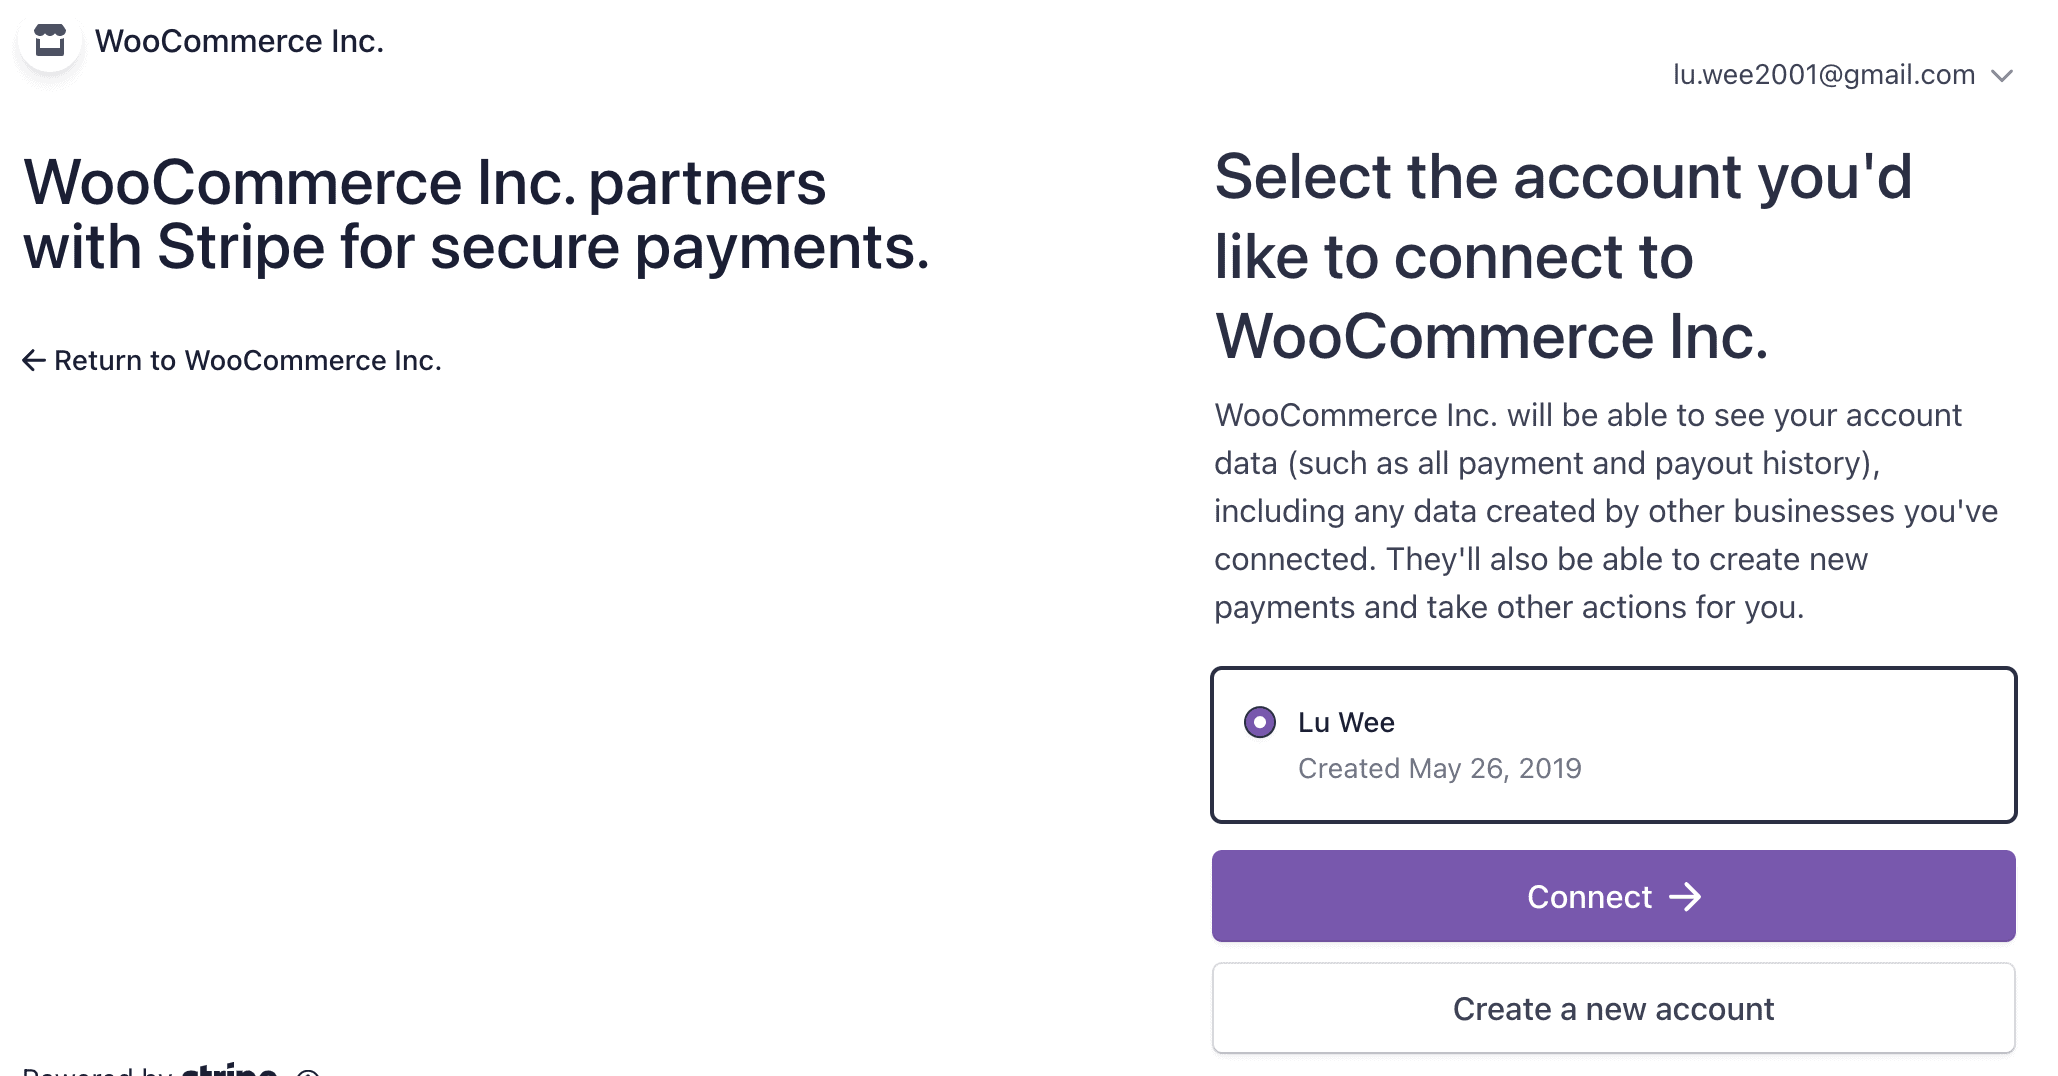
When you click on Stripe, you’ll be prompted to leave Shopify to connect your Stripe account to your store. If you have multiple accounts, choose the one which you want linked.

Once Stripe is connected, you’ll see this:
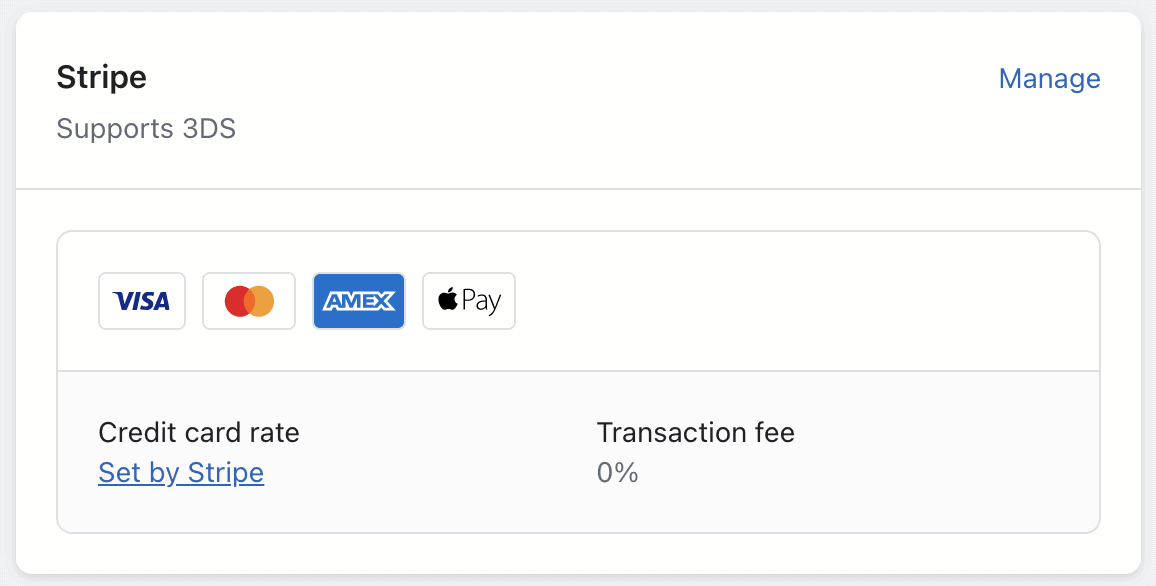
Click on Manage on the top right to adjust the settings. There are 4 payment methods:

Note you don’t get FPX or digital wallets in Shopify with Stripe. Additionally, Shopify payments are also not available in Malaysia (yet).
How to use Stripe in WooCommerce
To enable Stripe in WooCommerce, you need to enable the Stripe for WooCommerce plugin (download using the link, or look for ‘Stripe for WooCommerce’ in the plugin store).

Install the plugin.
After you install the plugin, Stripe options will appear under your WooCommerce store settings:
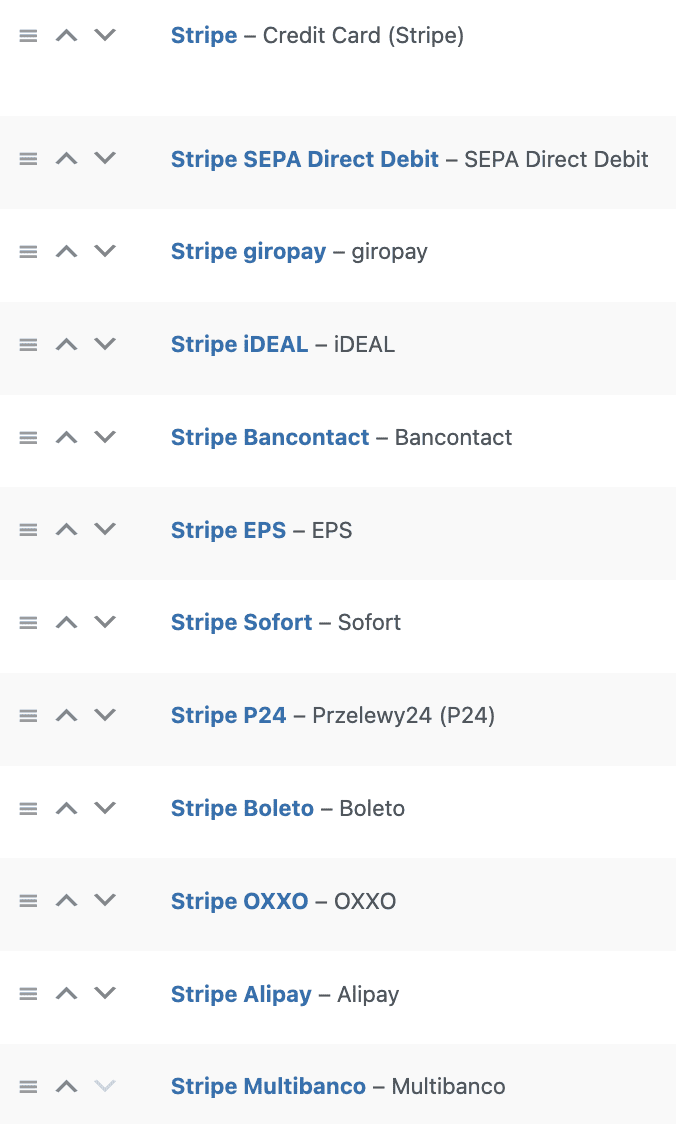
Click on ‘Stripe – Credit Card (Stripe).
Once you’ve connected Stripe to your WooCommerce store, you can enable it as a payment option for your customers.
Note that Stripe FPX is not available on WooCommerce.
How to create invoices in Stripe / payment links
Request for payment. Email. PDF.
If you want bill you customers using Stripe invoices, you need to first login to your Stripe account.
Then go to:
Billing > Invoices > Create an invoice
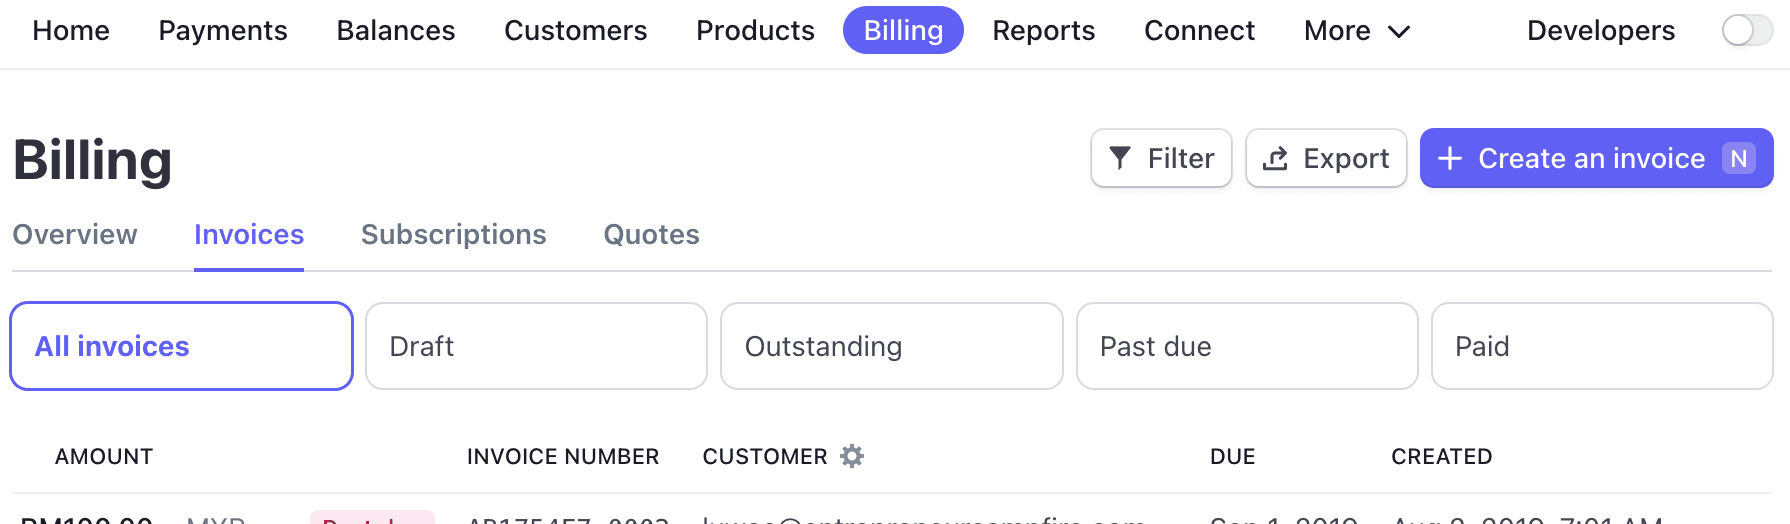
Add the customer you are billing to, and the products sold. You can add your customers and products inside the invoice, or in the specific sections.
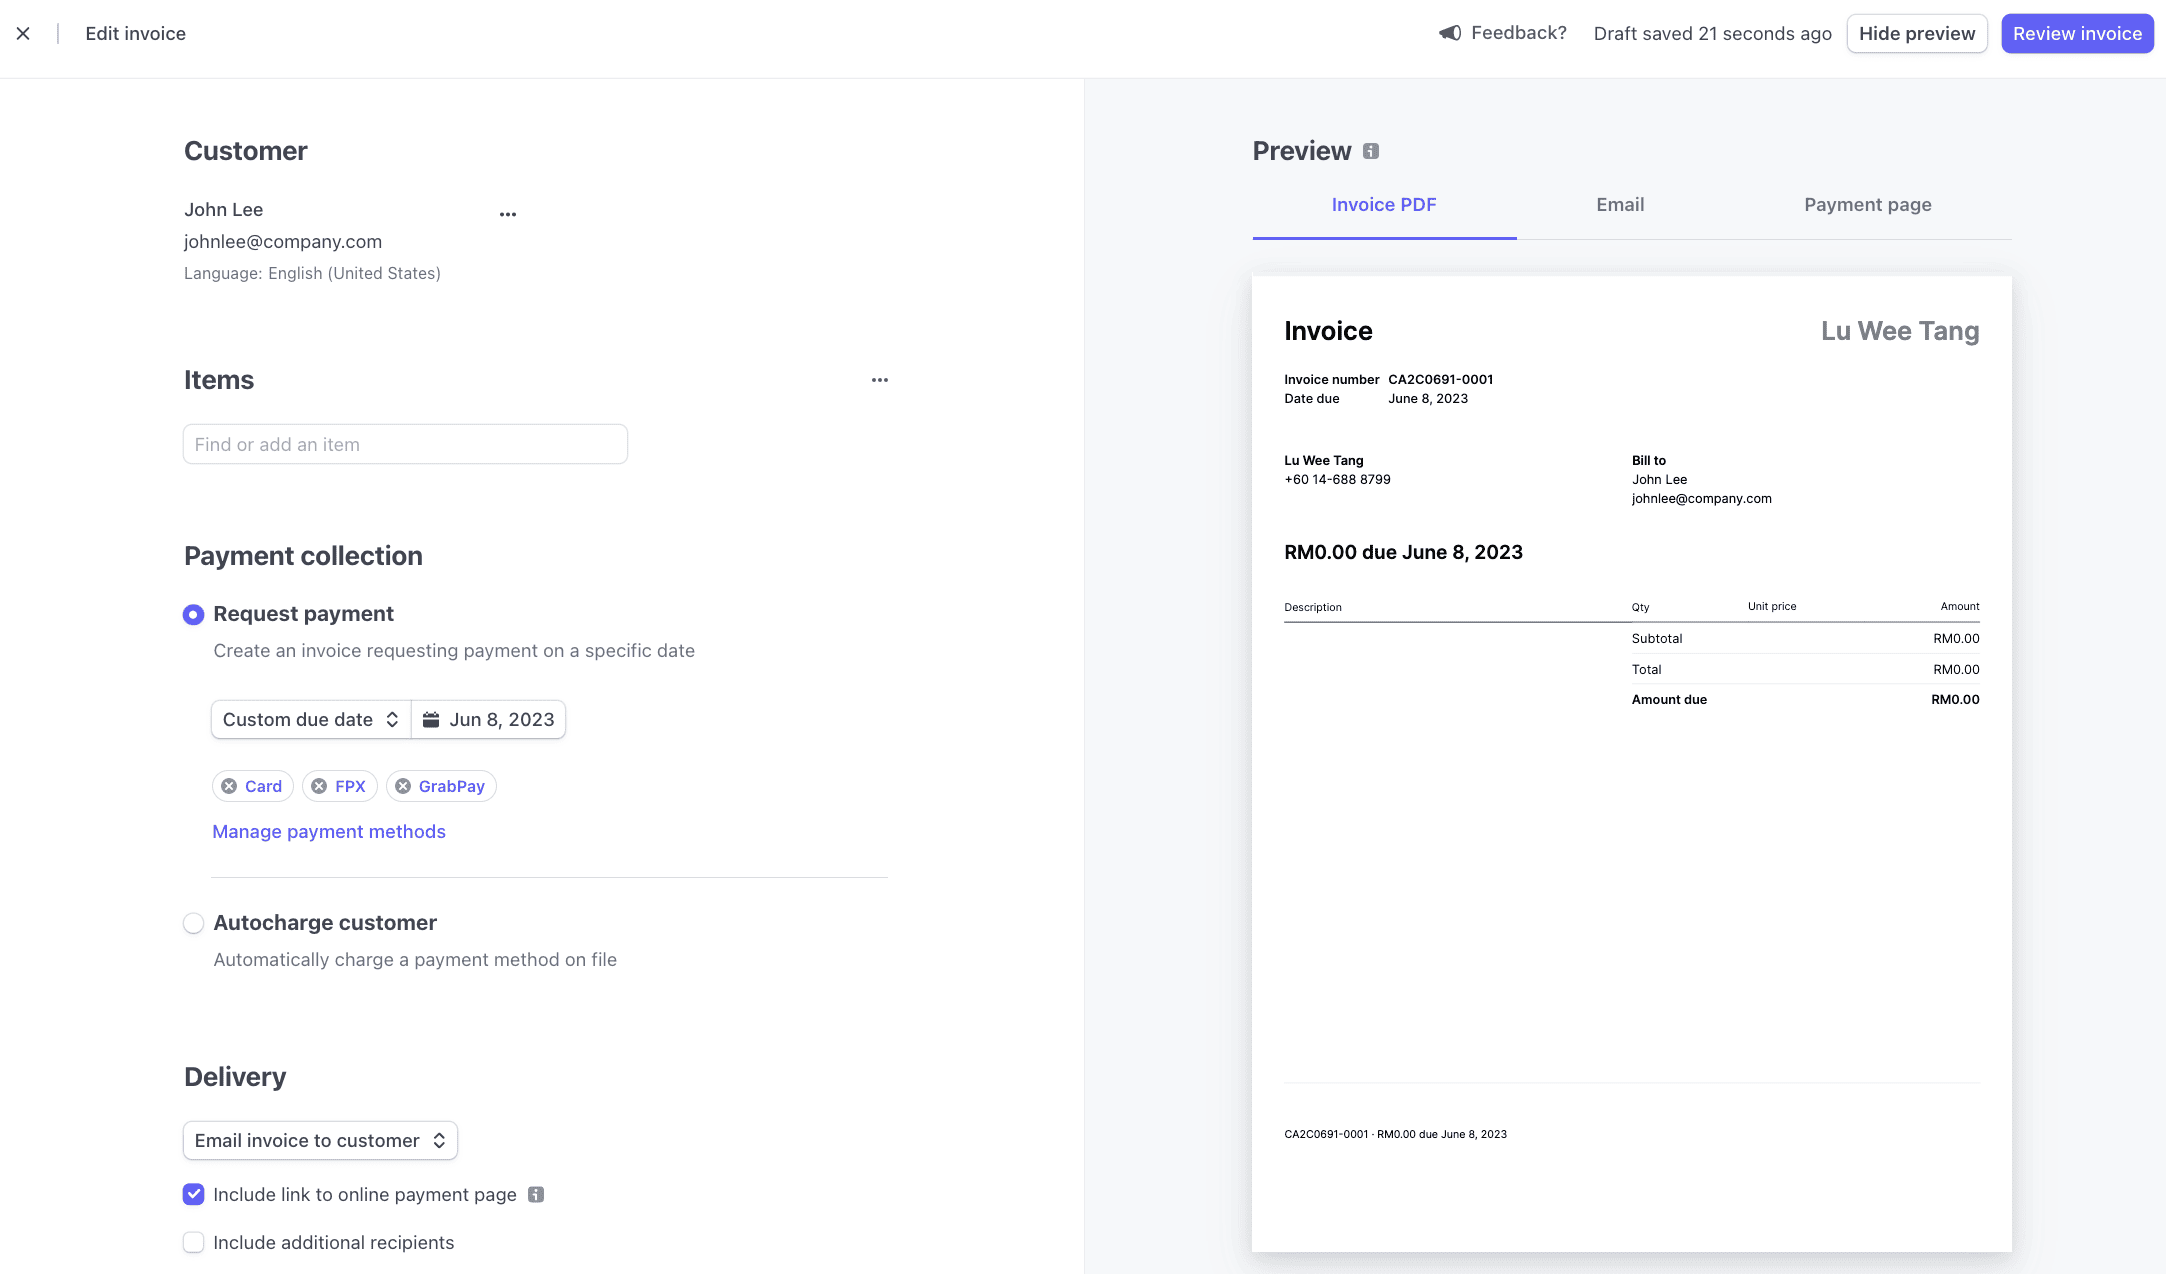
Let customer pay by the payment methods you select. Or auto-charge customer when the payment is due.
You may also opt to email the invoice to the customer or send a PDF of the invoice to the customer yourself. The customer can click on the enclosed payment link to make a payment.
How to create recurring invoices (Subscriptions) in Stripe
If you want to automatically bill your customers on a recurring basis, Stripe Subscription can also help you with that.
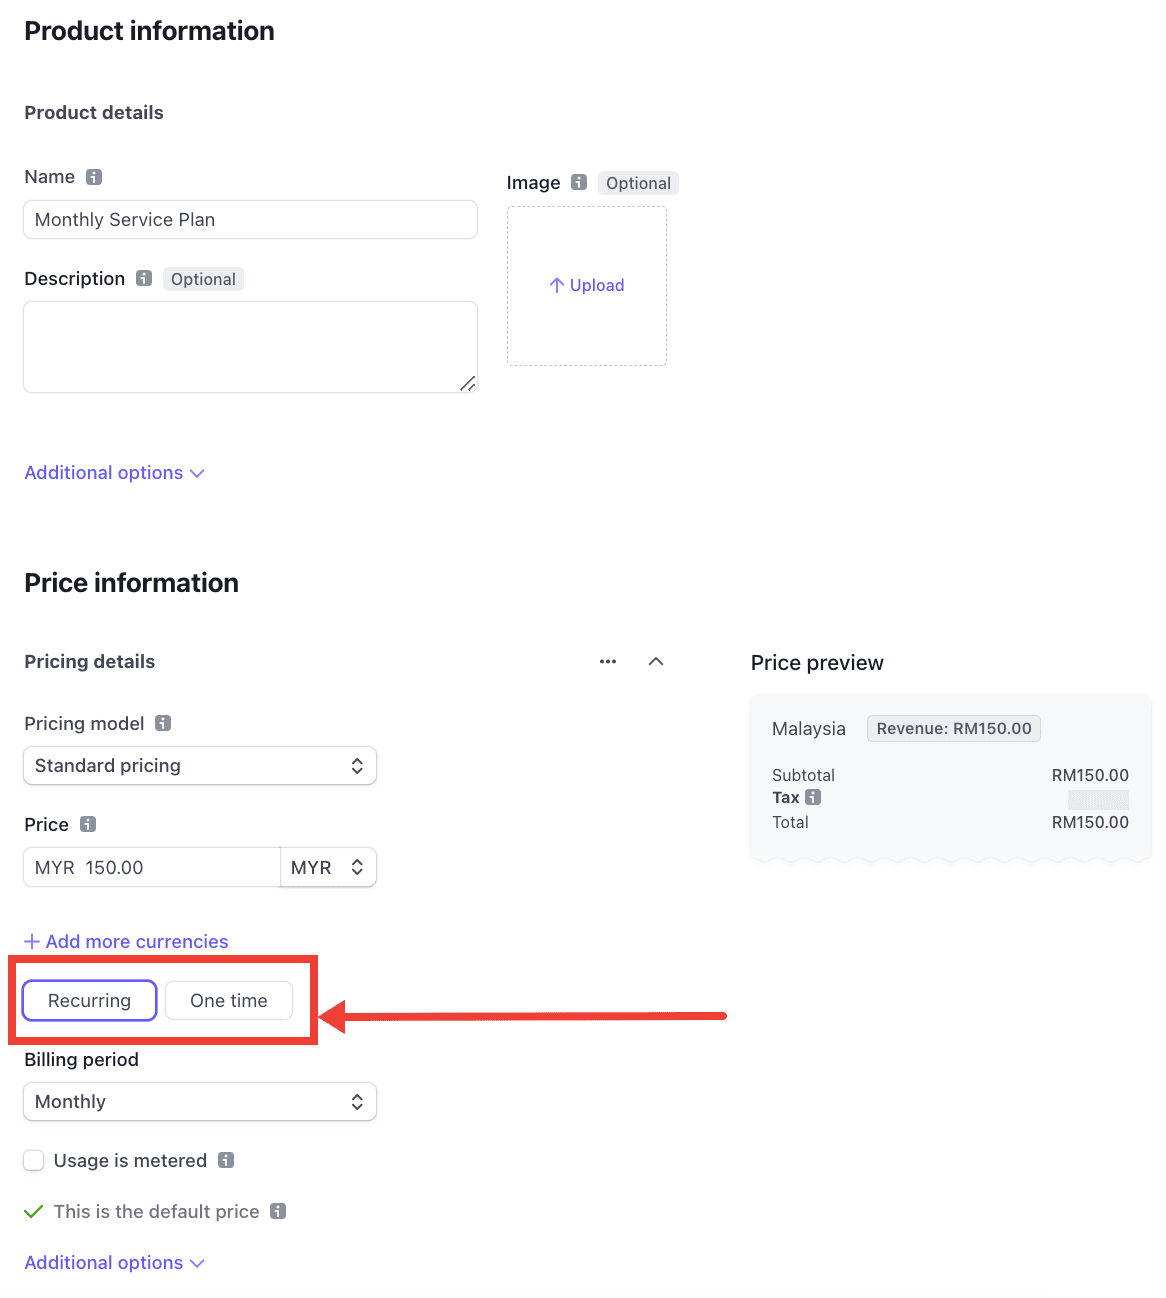
First, you need to create a product with recurring pricing. This can be single tiered or multi-tiered pricing.
There are 5 ways you can create a subscription in Stripe. For this tutorial, we’ll focus on the 3 no-code options.

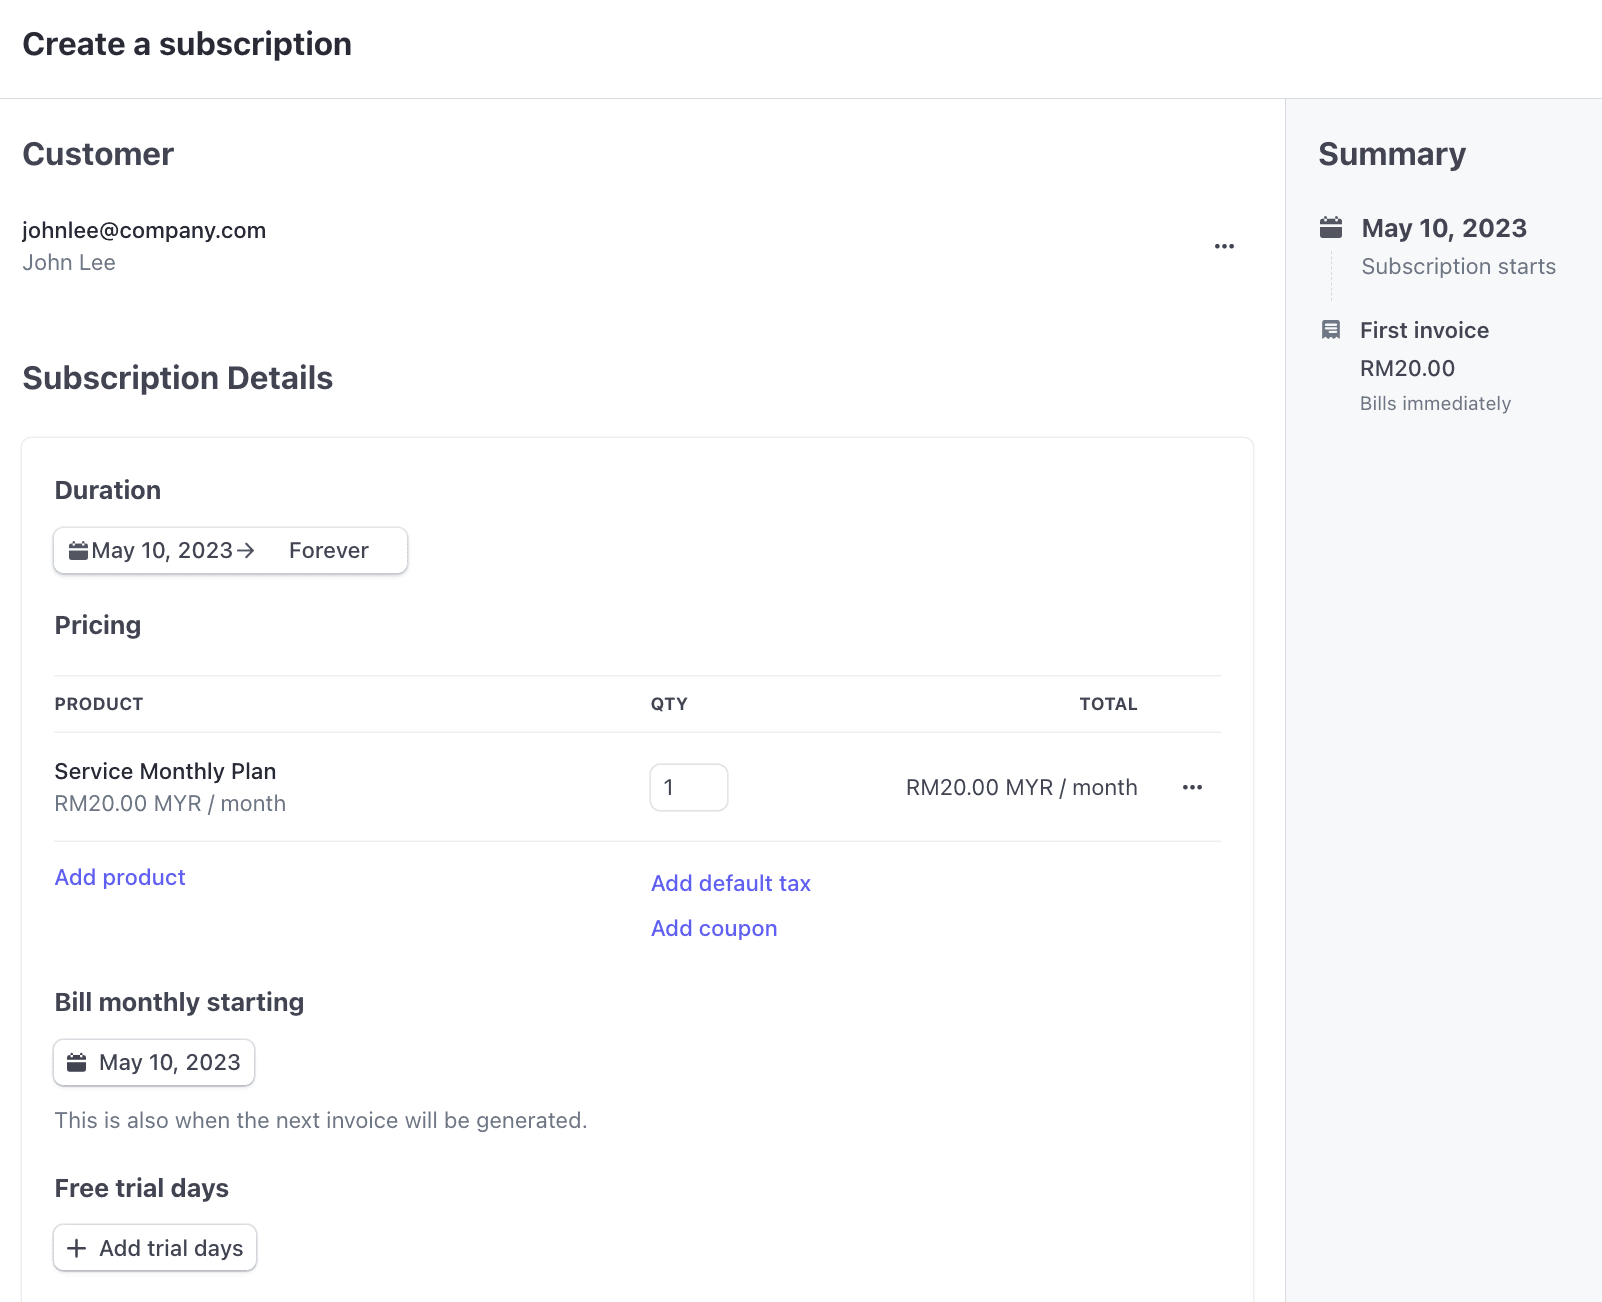
Method 1: Create a Subscription from Dashboard
This method lets you create a subscription for a specific customer. You can select key in or select their details and the plan they want to be on and charge them for the subscription or send them an invoice for it.
Go to:
Invoice > Subscriptions > Create Subscriptions
You have the option to select when billing starts, and if you want to offer a trial period for your customer.
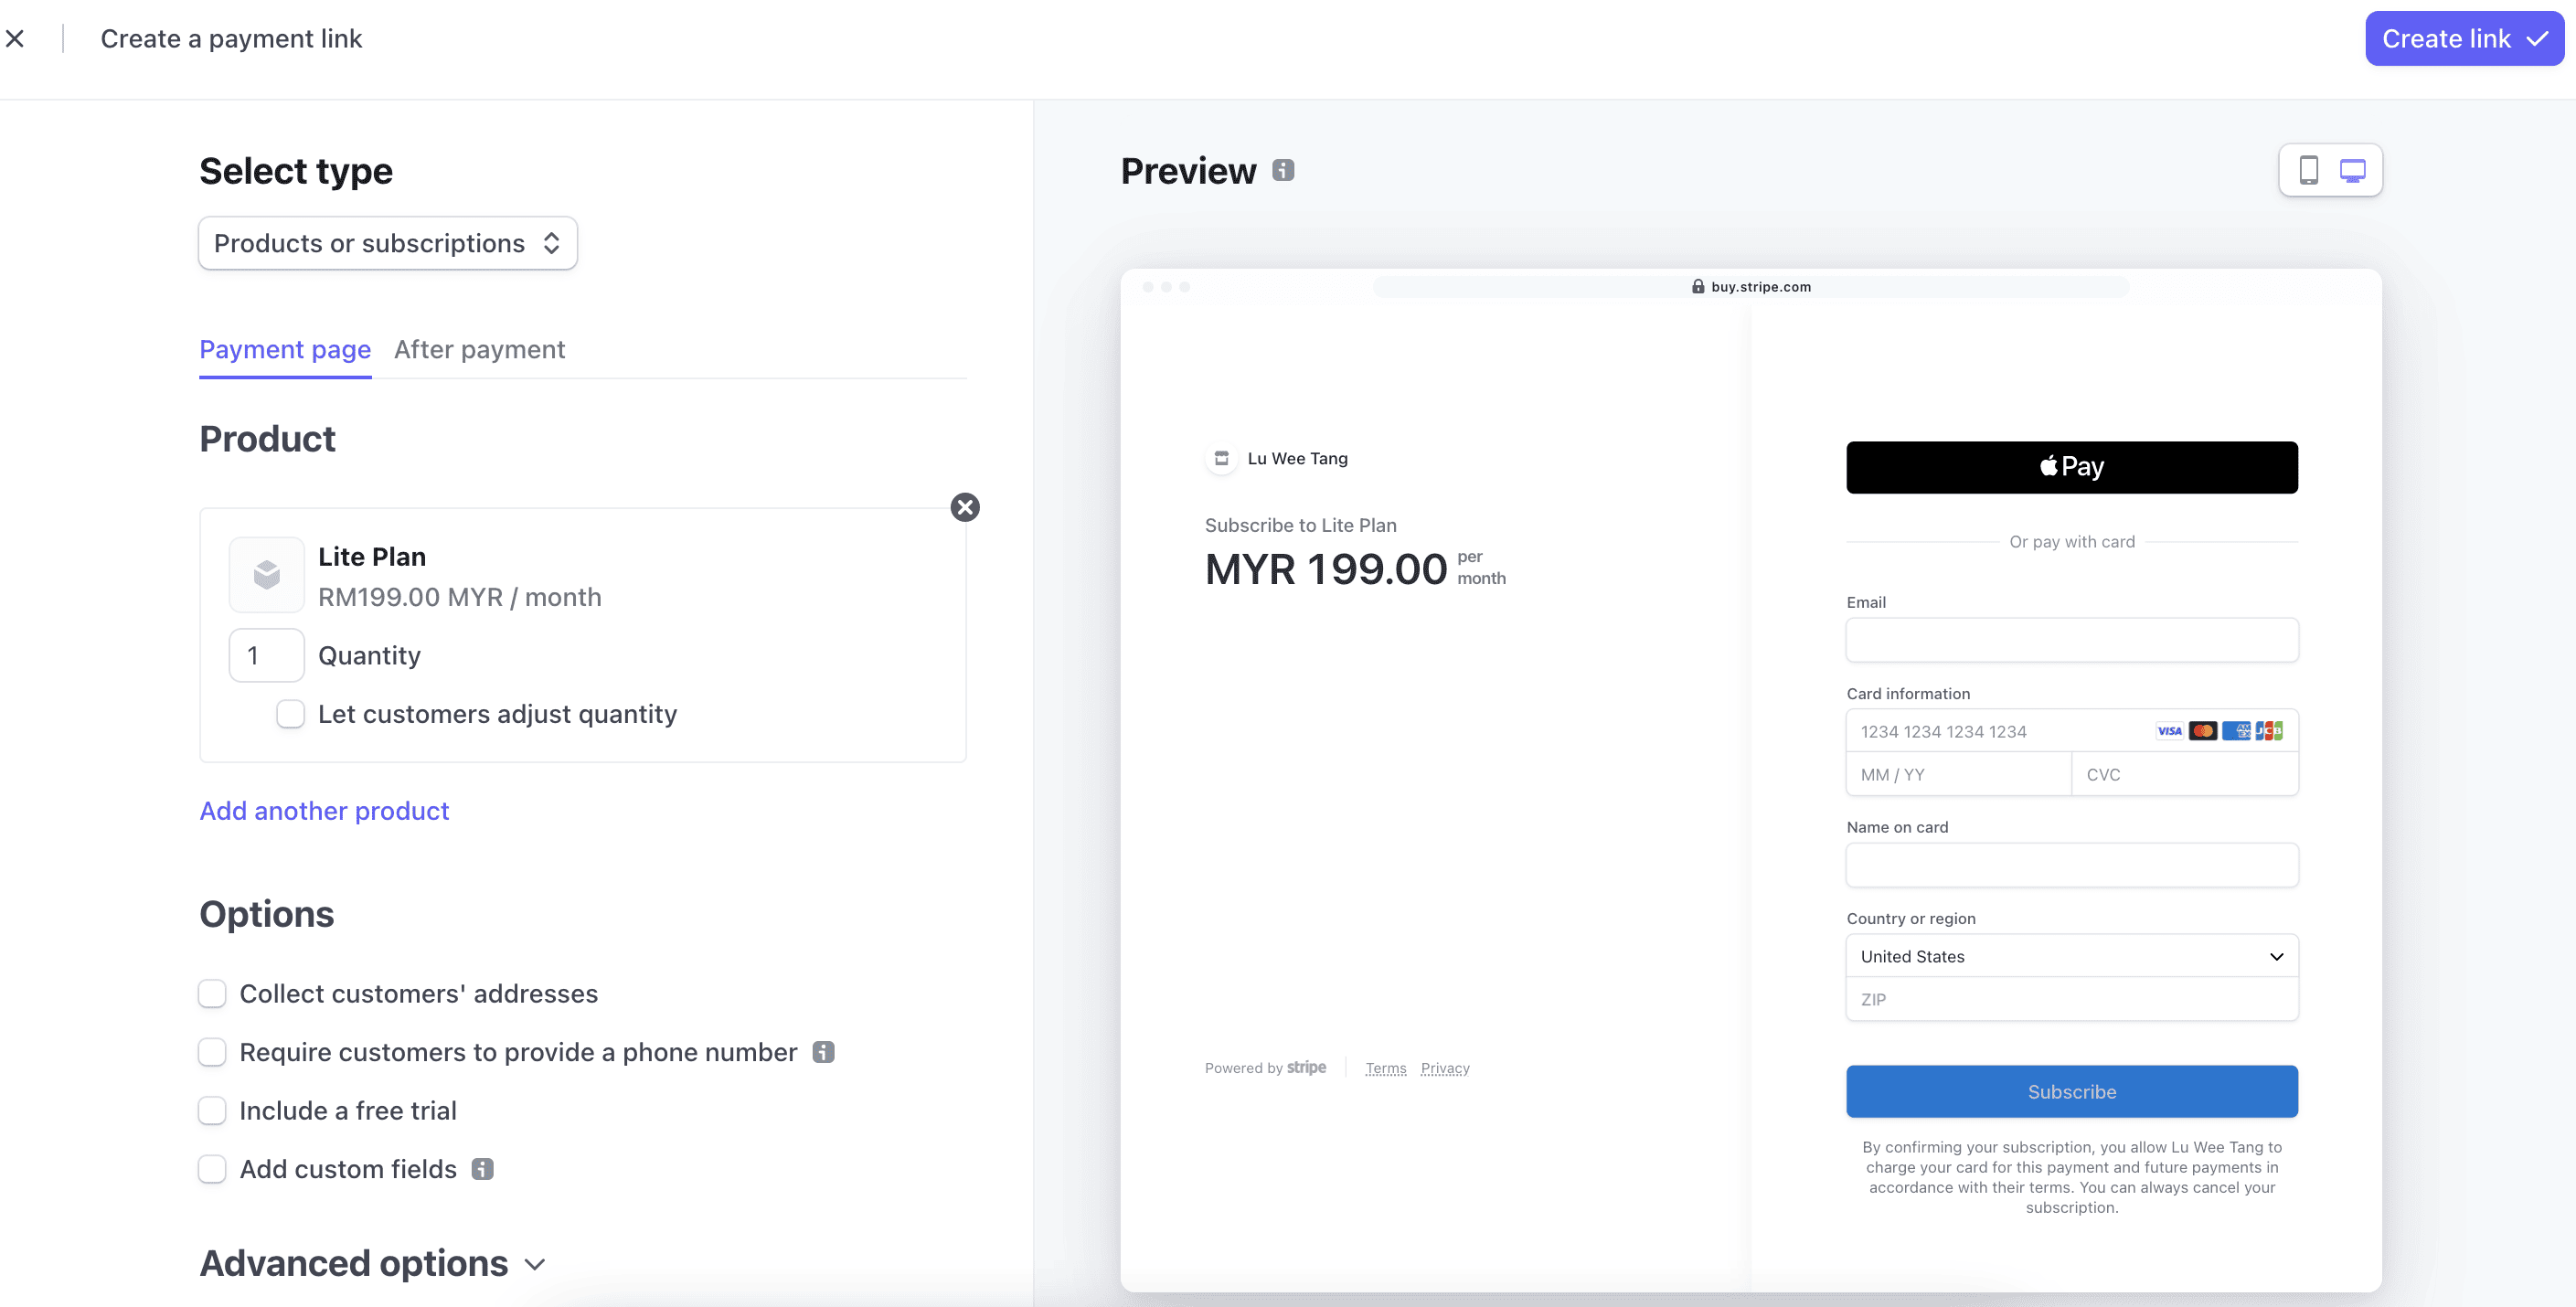
Method 2: Share a payment link with your customers
With this method, you can create a general payment link customers can sign up with. The customer will need to key in their details and payment information on the payment page to sign up.
Go to:
Invoice > Subscriptions > Create Payment Link
Here, you also have the option to select when billing starts, and if you want to offer a trial period for your customer.
Method 3: Pricing table
If you offer different tiers of subscription, you can also create a pricing table where you display different pricing tiers to your customers.
Go to:
Invoice > Subscriptions > Create Pricing Table

Once the Pricing Table has been created, you can embed it on your website.
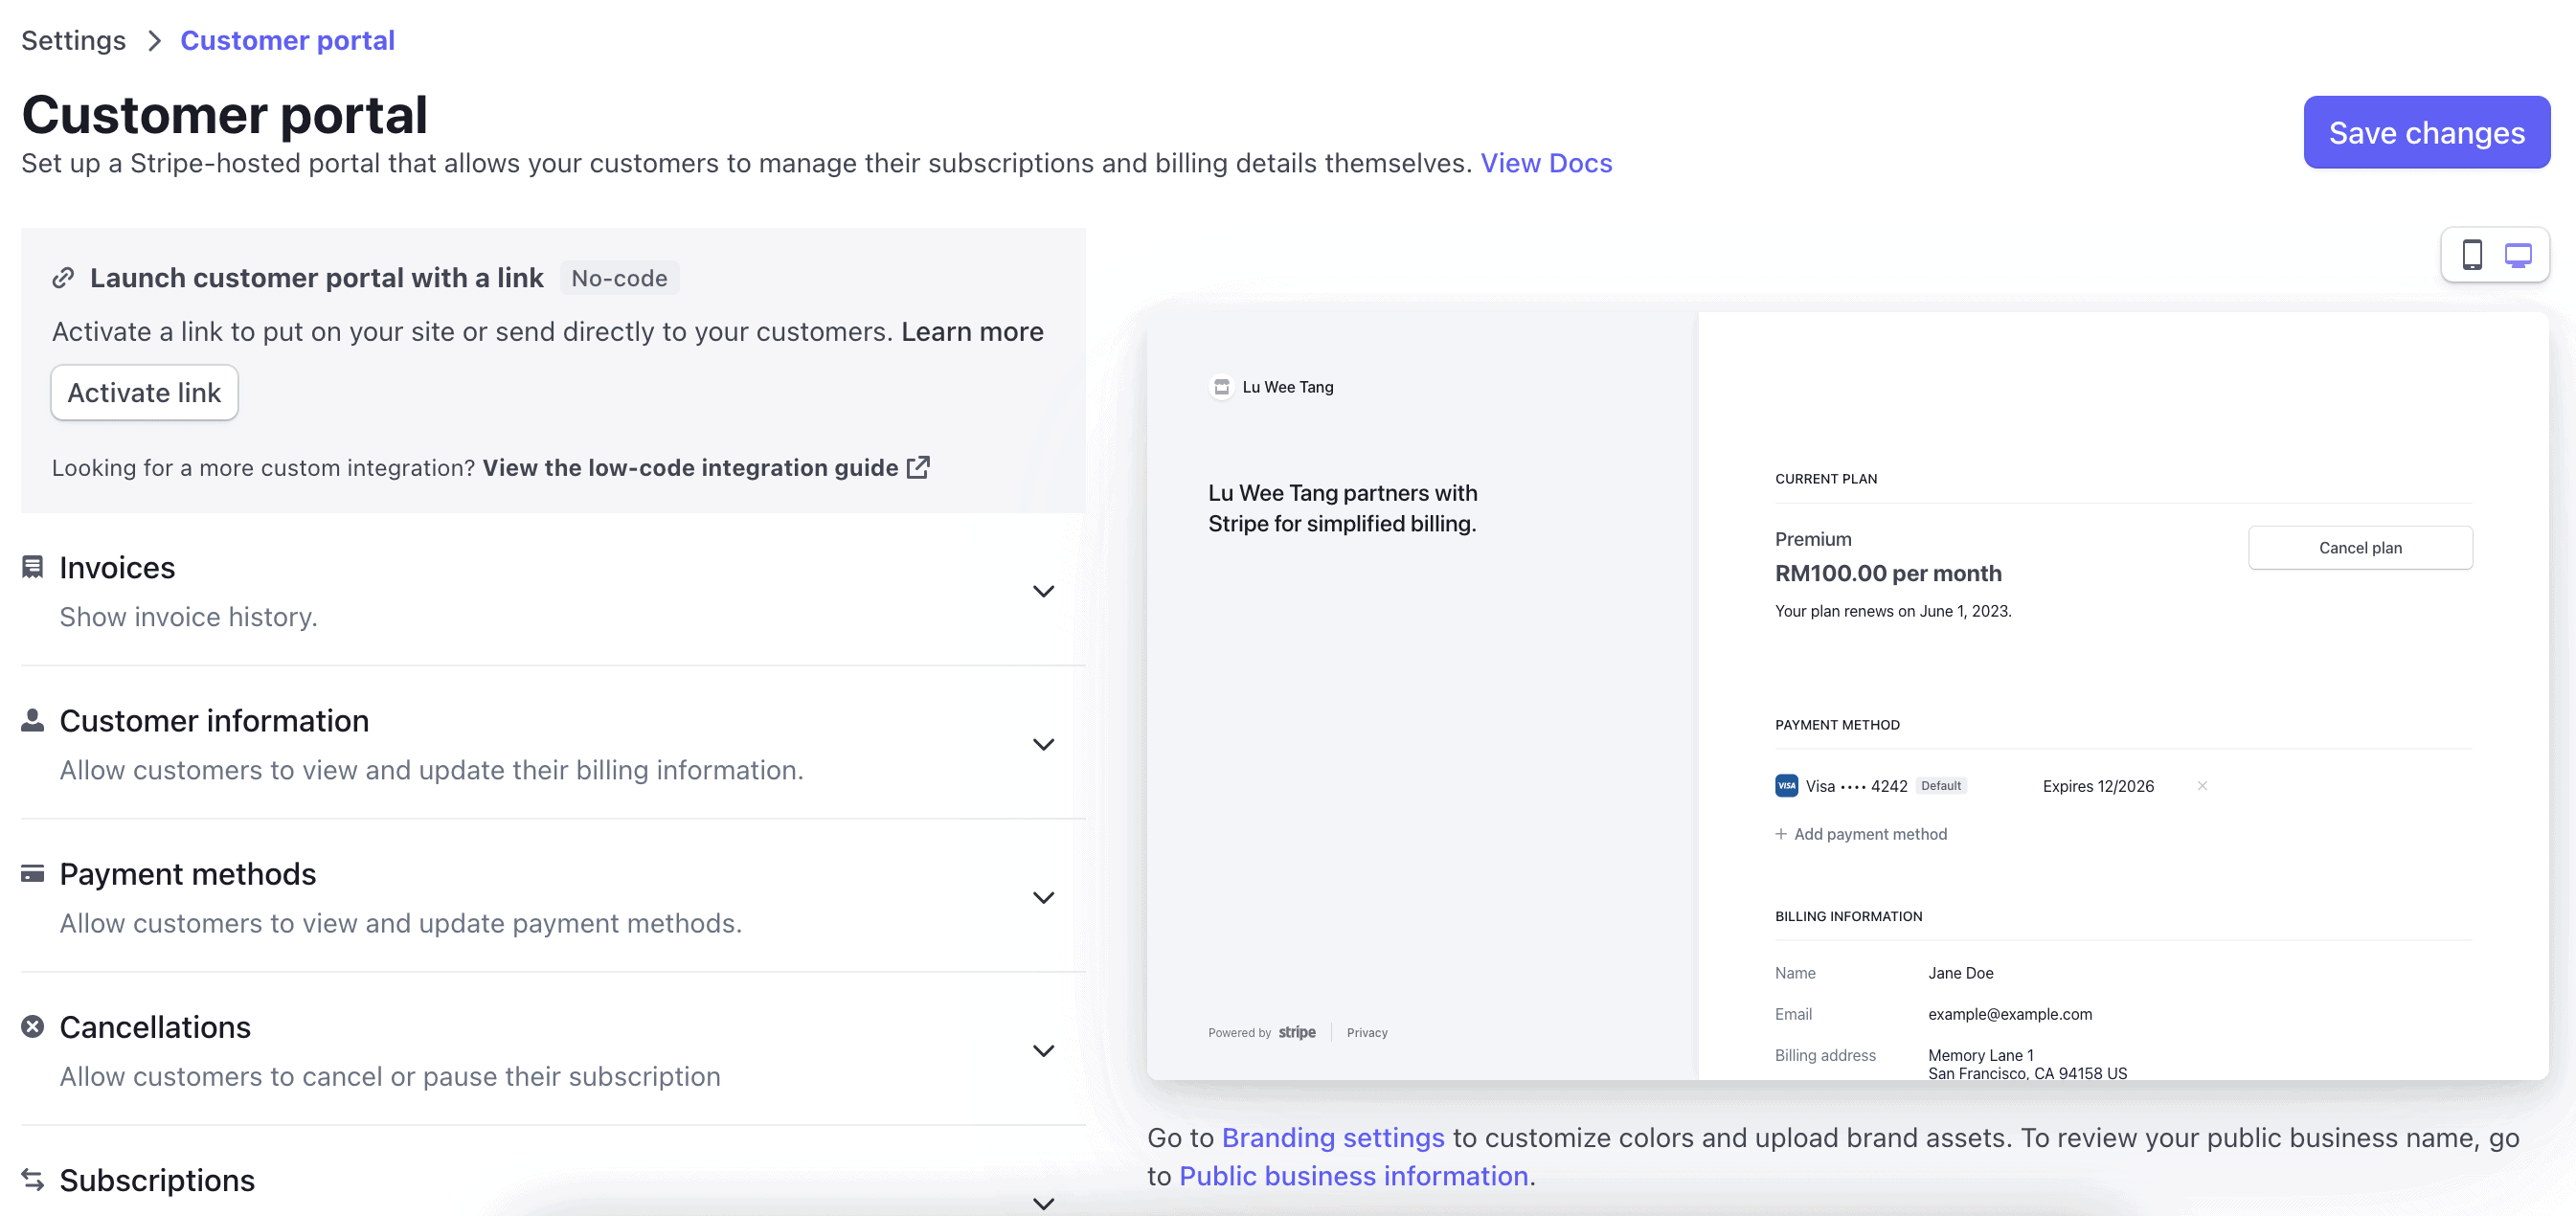
If you want to let your customers manage their subscriptions, you can also create a Customer Portal.
Are you already accepting payments with Stripe?
No doubt, Stripe offers many ways to accept payments. It’s no surprise given how flexible Stripe’s development environment is like.
I’ve only covered no-code ways of working with Stripe in this article, but there are many other ways you can integrate Stripe into your business with code.
Do you use Stripe? Let me know if you love the product!